

Getting started with the Picqer app
The Picqer app lets you work paperless in your warehouse. It is available for iOS and Android.
On this page
Logging in with subdomain
When you log in, enter the first part of the URL you use for Picqer web in the 'subdomain' field. If your URL is 'mystore.picqer.com', you enter 'mystore' here. Your username and password are the same as in Picqer web.
Packing station and warehouse
After logging in you land on your home screen. The button with three dots in the top right is where you set where you are working:
- Packing station: choose the packing station whose printers you use.
- Warehouse: choose your preferred warehouse. You only see this option if you have more than one warehouse.
Your packing station and warehouse are shown under your name at the top of the screen, so you can always see what you are working with. You also log out from the same button.
What you can do in the app
At the top of the home screen you see which picklists, batches and tasks are assigned to you. Below that you see the number of open picklists and the number of picklists processed today, for the warehouse you selected. If you have not selected a warehouse, all warehouses are counted. Then comes the menu with everything you can use in the app:
- Picklists: view, pick and ship open picklists.
- Batches: create and pick batches, see Batches in the app below.
- Purchase orders: look up your purchase orders and start a receipt for them.
- Receipts: register a receipt and book in products.
- Products: look up or scan a product and check its stock and locations.
- Movements: collect and put away movements.
- Stock counts: count stock on your locations.
- Locations: look up locations, create them and link products to them.
- Containers: view and fill your containers.
- Replenish advice: replenish products from your bulk locations.
- Comments: read and answer comments that mention you.
- Tasks: check off your tasks.
What you see depends on your rights in Picqer. If you have no purchasing rights, for example, 'Purchase orders' and 'Receipts' will not appear in your menu.
At the bottom of the menu you will find 'Help and feedback', where you can ask our support team a question without leaving the app.
Batches in the app
Under 'Batches' you will find all open batches. A normal batch shows the number of picklists, a singles batch the number of products, because there you collect the products without keeping them apart per picklist.
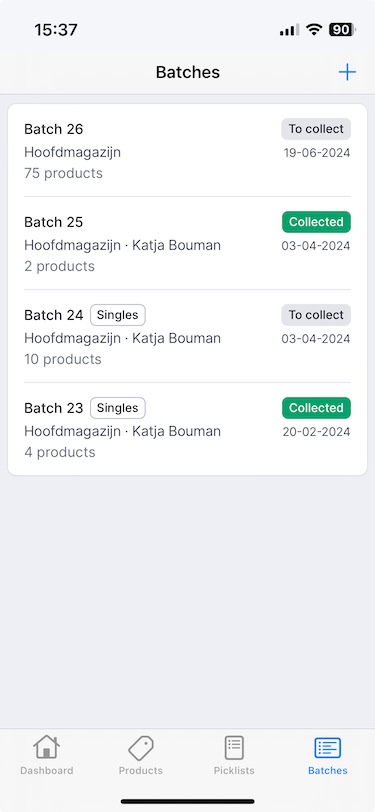
Create a batch
To create a new batch, click the plus sign at the top. An overview of your batch presets appears. If you have many presets, use 'Search presets' to find the right one.
Each preset shows how many picklists match it. Click 'Create' next to the preset to create the batch. If no picklists match a preset, you cannot select it.
Want to choose the picklists yourself? Click the button with three dots in the top right and choose 'Manual'. You then fill in the same form as when creating a batch in Picqer web.
If you haven't created any presets yet, go to 'Create batch' and click on 'Manage presets' in Picqer web to create them.
Processing a singles batch in the app
Click on the singles batch to process it.
Click 'Start', scan the relevant product, or click on the product in your screen.
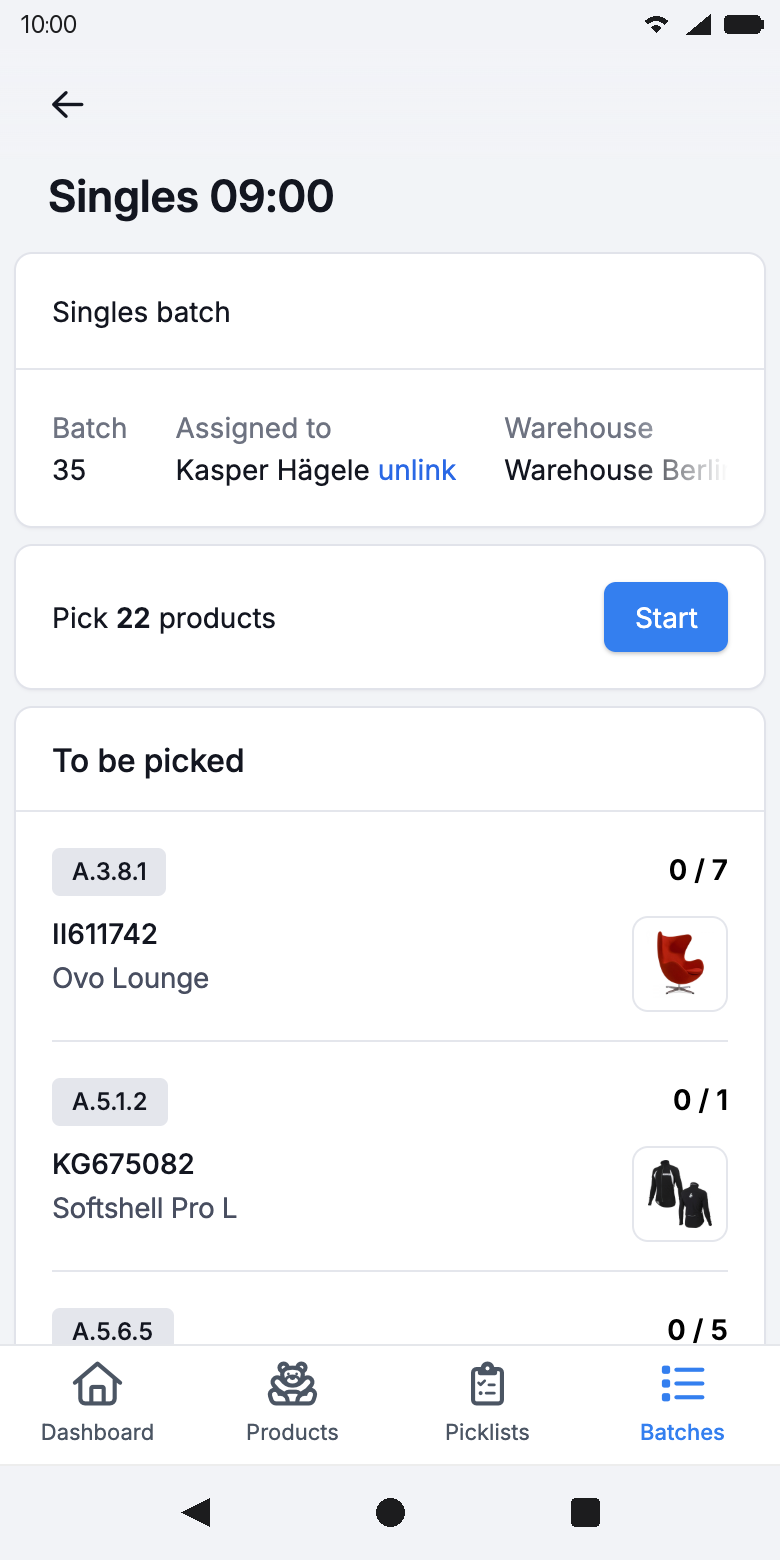
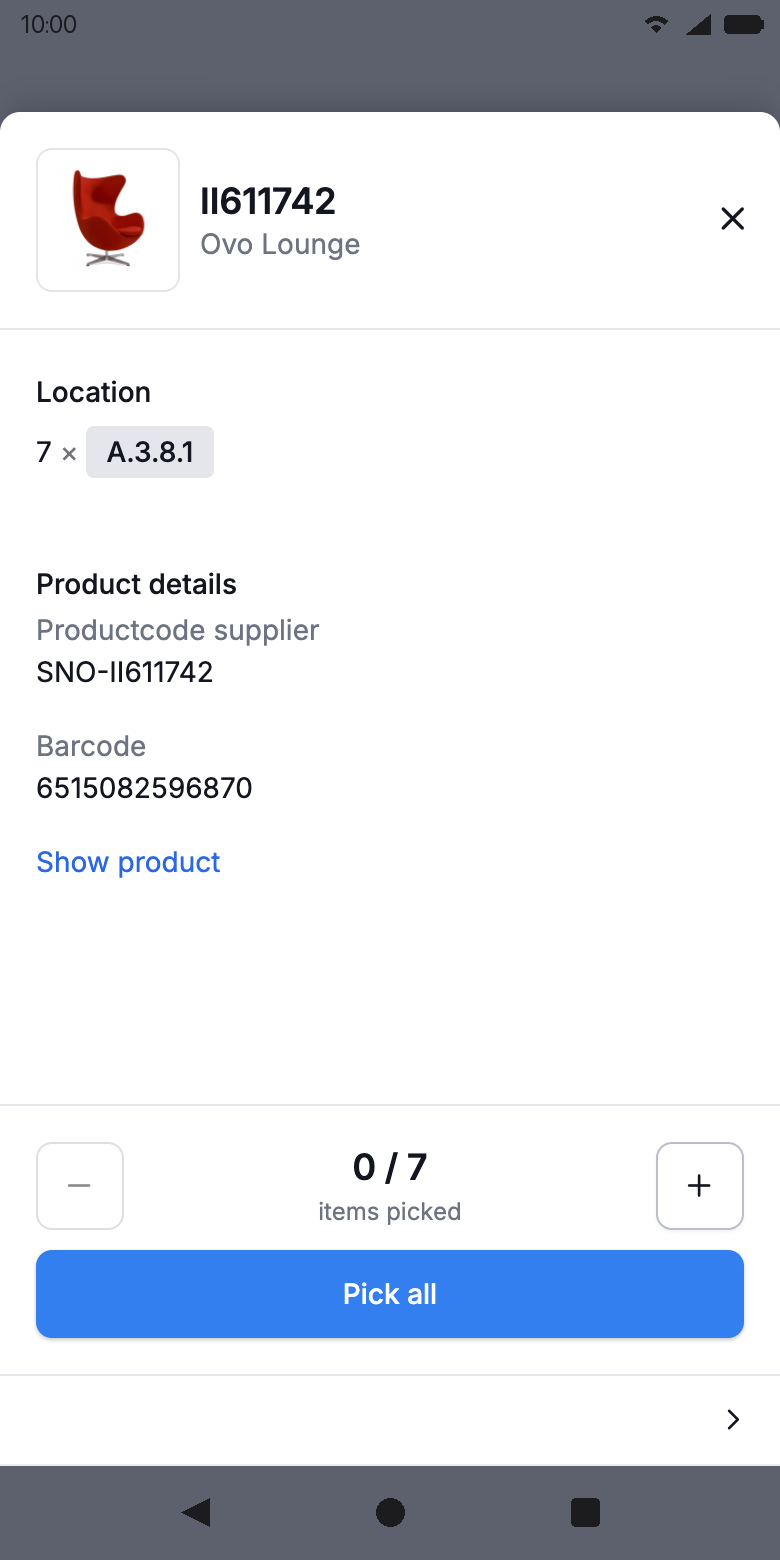
In all cases, the product detail screen will open. Here you will find the location, product code, supplier product code, and the product's barcode(s). You can also enlarge the product image if available.
In the product detail screen, you can scan the product or manually adjust the quantity. If you click on 'Pick all', the entire quantity will be picked at once. You only see this button with the 'Mark all products as picked manually' right.
When the correct quantity is picked, the 'Next product' button will appear. Continue this process until the entire batch is picked.
You can also skip a product or go back to the previous product by clicking the arrows at the bottom of the screen.
Once you have collected the entire batch, process it at the packing table in Picqer web. There you scan each product and Picqer creates the shipment for the matching picklist. Read more about processing singles batches. You can also open the picklists one by one in the app, pick them and ship them with 'Create shipment'.
Processing a regular batch in the app
Click on the batch to process it.
If you haven't already, link the picking containers to your picklists by clicking 'Link containers'.
Click 'Start', scan the relevant product, or click on the product in your screen.
Click on the container numbers next to your products to actually collect them. Once a product is fully collected, Picqer will automatically move to the next product.
When all products are collected, the message 'This batch is completely collected' appears. The picklists are listed below the batch. Open a picklist, pick its products and click 'Create shipment'. You can also do this in Picqer web.
Scanning barcodes with your phone's camera? Read how to use the camera scanner. For an overview of the devices and scanners we support, see supported devices and barcode scanners.