Linking ReturnGO to Picqer
Easily link the ReturnGO return integration to your Picqer account.
What does the integration do?
- All return information from ReturnGO is automatically transferred to Picqer.
- Return updates in Picqer are sent back to ReturnGO.
Configure returns in Picqer
In Picqer, go to Settings > Returns.
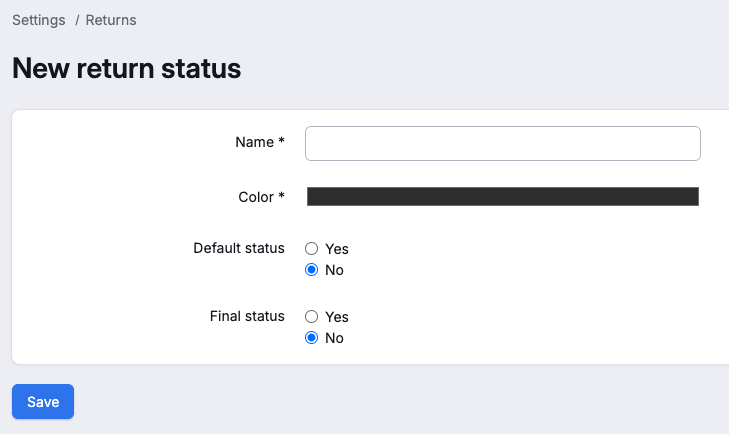
Click on ‘+New status’. The following screen will appear:

Fill in all the fields and optionally choose a color for the status.
- Name: Expected
- Default status: No
- Final status: No
Click ‘Save’
Then click on ‘+New reason’. The following screen will appear:

Create the return reasons you want to use. You can create one return reason at a time. Fill in the following fields:
- Name: Custom return reason
- Default reason: ‘Yes’ or ‘No’
Click ‘Save’
Generate a new API key
In Picqer, go to Settings > API keys > +New API key.
Give the API Key a name and click ‘Add API key’.
Copy the API key immediately, as you will only receive it once.
Enter the API key in ReturnGO
In ReturnGO, go to Integration > Products & Services
Click on +ADD PRODUCT OR SERVICE
Select Picqer from the dropdown menu
Enter the following details:
- API Key: Picqer API key
- Account subdomain: the URL of your Picqer environment (https://storename.picqer.com/)
- ID of the return status in Picqer: Settings > Returns > Statuses. Click the return status and use the digits in the URL after "statuses". This is your return status ID. In the example below, it's "8052".

- ID of the default return reason in Picqer: Settings > Returns > Reasons. Click on your default reason and note the number combination in the URL after "reasons".
Click on CONNECT
Support
If you have any questions about the integration between ReturnGO and Picqer, you can contact ReturnGO at support@returngo.ai.


