Register a receipt
When you receive a purchase order from a supplier, you register the receipt in Picqer. This adds the products to your stock and records that the purchase has been delivered.
On this page
Create a receipt
You can create a receipt in two ways:
-
From a purchase order: you are receiving products from a single purchase order. This is the most common method. Go to the relevant purchase order and click "Register receipt" in the top right.
-
For a specific supplier: you are receiving products from multiple purchase orders, or you haven't created a purchase order for these products yet. Go to receipts and click "New receipt" in the top right.
Picqer automatically selects the correct purchase order per product, starting with the oldest open order. If you receive more units than are included in a single order, Picqer automatically splits the receipt across the relevant orders. You can also manually choose which purchase order to receive against.
Receive products
Once you have created the receipt, you can start receiving products to a location or container. In most cases, we recommend working with a container. This allows you to first check quantities without placing products on their final location.
Link a location or container
Click "link" in the top right and scan or select the location or container. Want to receive products in a single receipt across different locations or containers? Skip this step. You can choose a location per product in step 2.
Register the products
Pick up the first product and scan the barcode. If the product has no barcode, search for the product manually in the receipt.
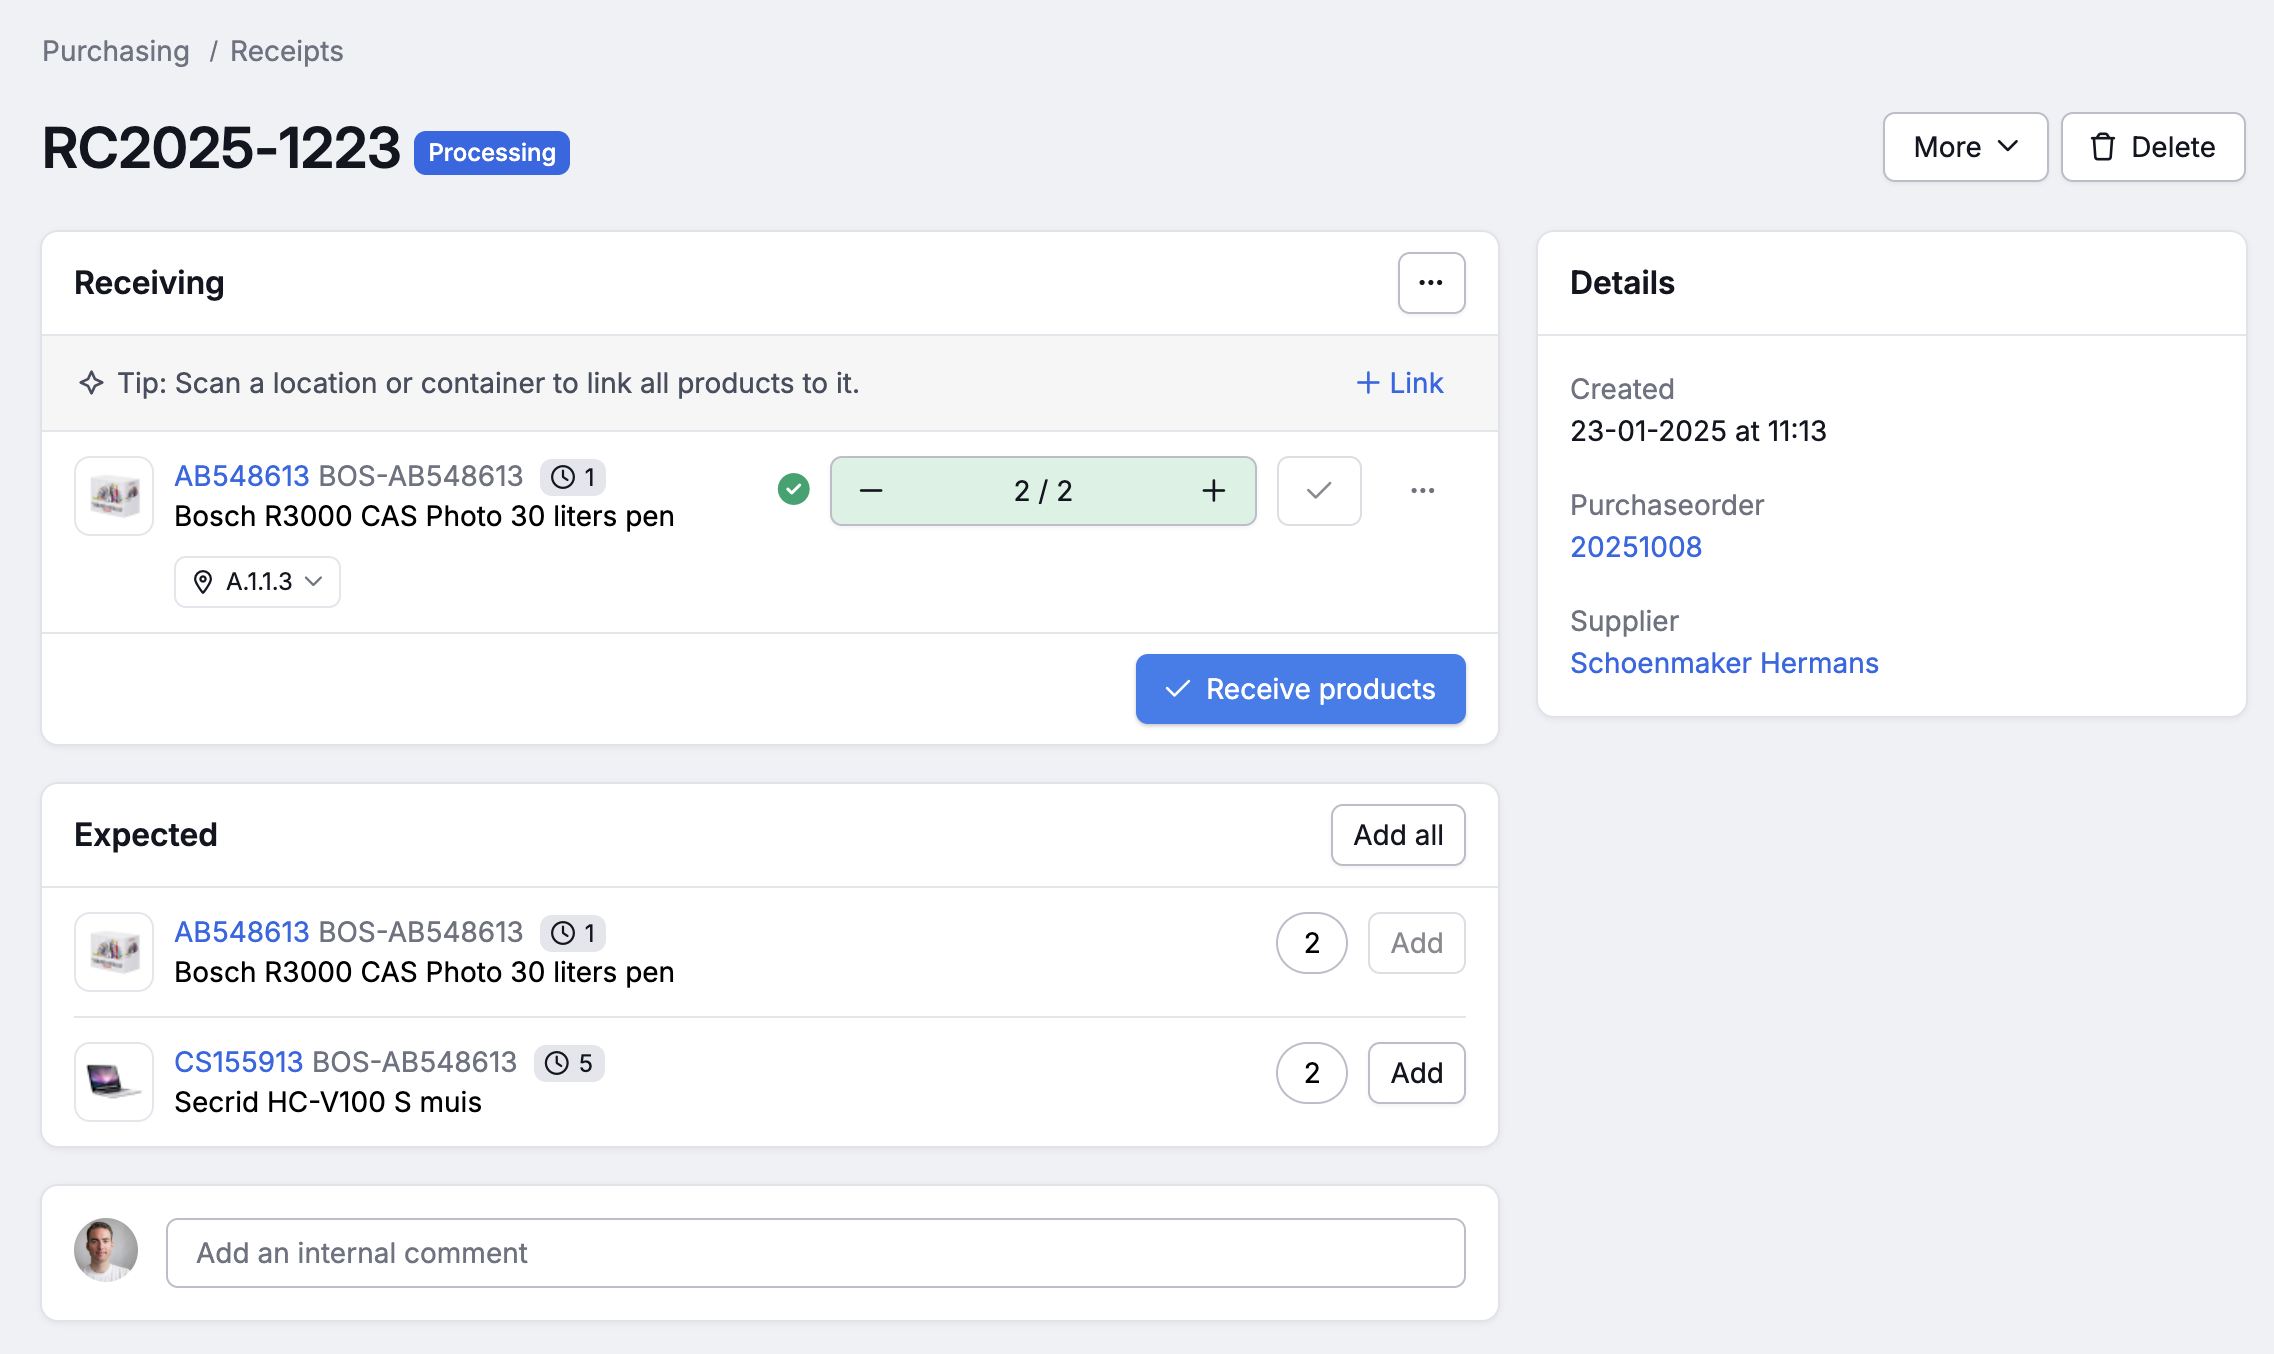
Scan all units of the same product, or count manually and confirm with the checkmark that you have processed all units.
To receive a single product across multiple locations, click "Receive products" after each location, then select a new location and repeat for the remaining units.
Add to stock
Click "Receive products". The products are immediately added to your stock and appear in the "Received" section at the bottom of the page.
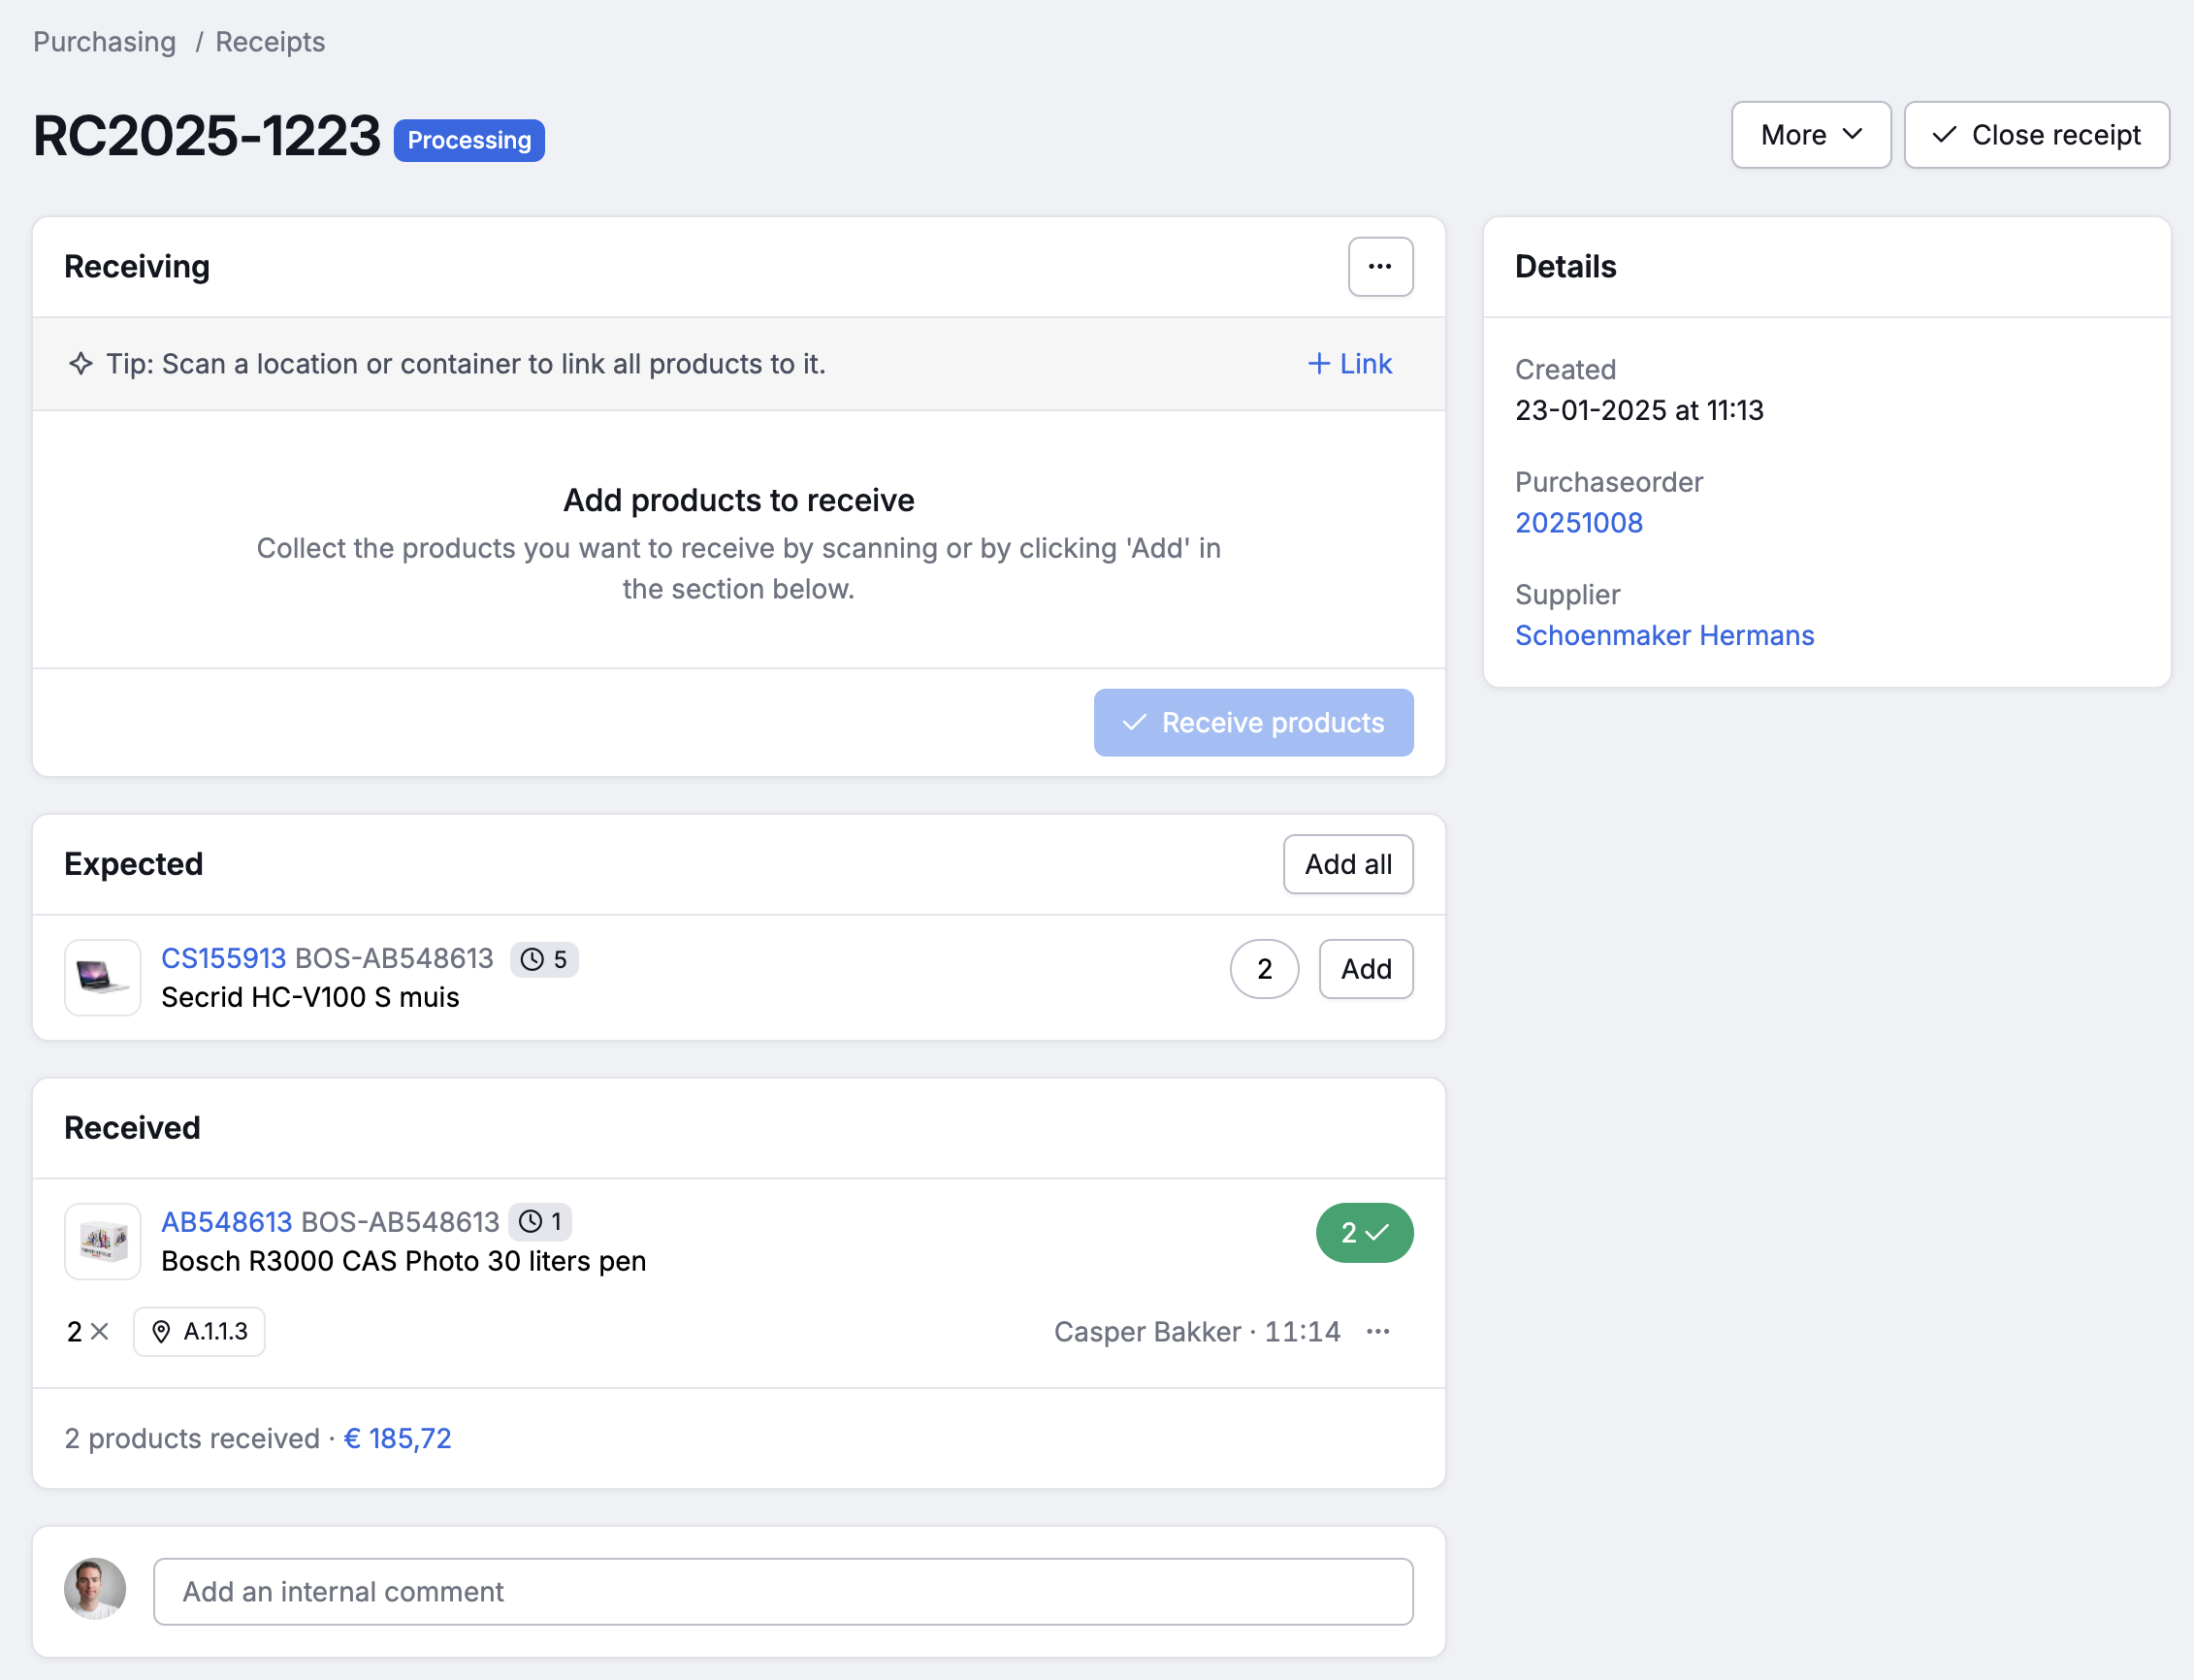
Repeat steps 2 and 3 for all remaining products.
Complete the receipt
Finally, click "Complete receipt" in the right corner to let your colleagues know you are done.
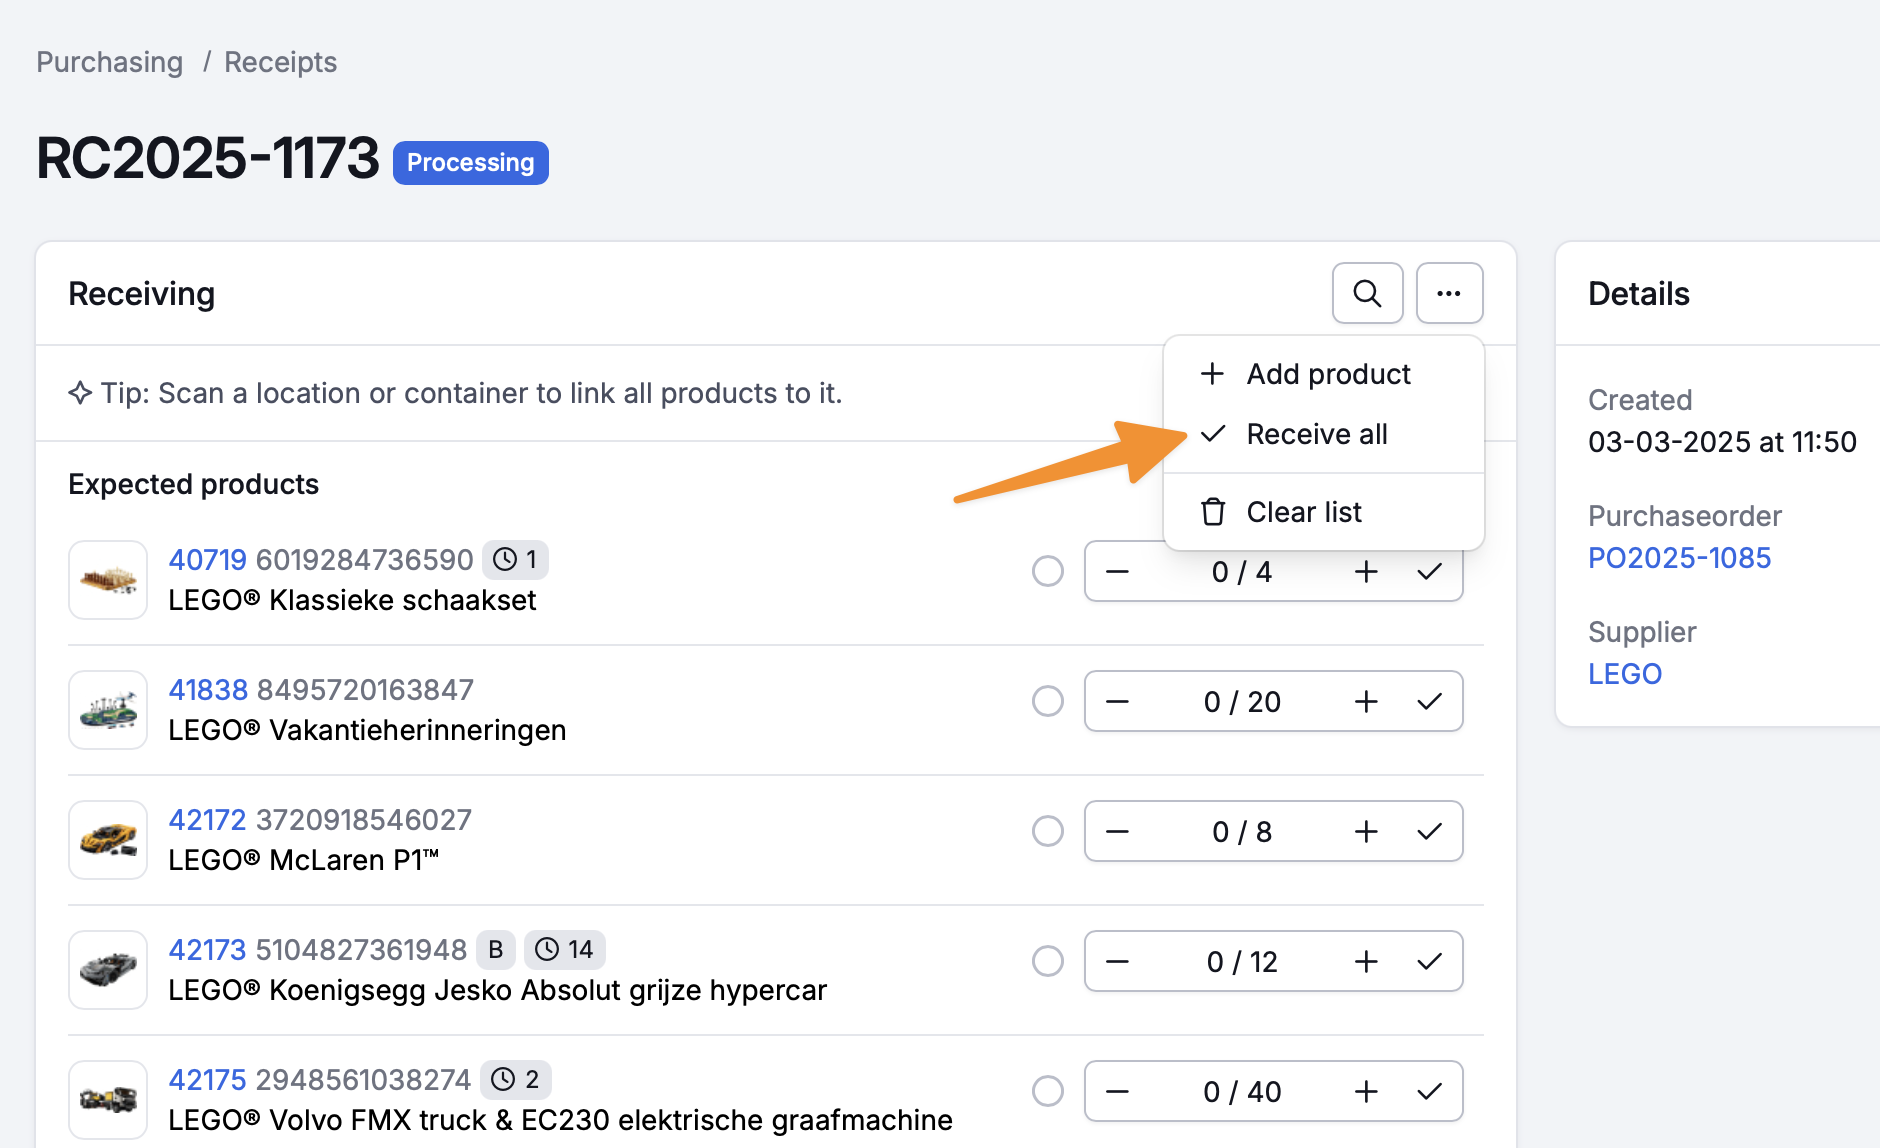
Receive all products at once
If you've already counted the products manually and want to process everything at once, click "Receive all". This fills in the expected quantities for all products. You can still adjust quantities or locations before clicking "Receive products".
Revert a receipt
Accidentally received the wrong product or quantity? Click the three dots next to the relevant line and choose "Revert". Picqer reverses the receipt and removes the quantity from your stock. The line remains visible in the history, including a note that it was undone.

Automatically closing a receipt
When you are done with your receipt you can close it manually. In addition, Picqer also automatically closes receipts after inactivity:
- If no products have been received for 1 hour, but all expected products from the purchase order have been received.
- If no products have been received for 24 hours, even if not all expected products have been received, or if the receipt is not linked to a purchase order.
Closing a receipt helps you see more clearly what's still open and what's already completed. Purchase orders that have been fully received, will be closed automatically after the receipt is closed.


