

Installing PrintNode
You print shipping labels, packinglists and other labels automatically from Picqer. PrintNode sends every print job straight to the right printer. This article explains how to create a PrintNode account and install PrintNode on the computers in your warehouse.
Creating an account
A PrintNode account is included in your Picqer subscription, so you don't need to sign up with PrintNode yourself. Go to Settings > Printers and click 'Create PrintNode account'.
You'll receive your login details by email. You'll need them to log in to PrintNode later. At api.printnode.com/app you can change your password or email address, or request a new password.
Installing PrintNode
You can install PrintNode on as many computers as you need, and use the printers on all of them from Picqer.
Download PrintNode on the computers your printers are connected to. Choose the Windows or Mac version. The installation steps are similar.
Go through the installation. You don't need to change anything along the way. On Windows, leave 'Install as a Service' off, or you won't be able to choose the right settings for shipping labels.
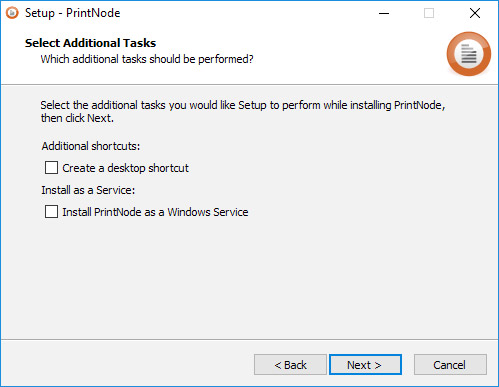
By default, we recommend leaving 'Install as a Service' off. Have a specific reason to run PrintNode as a Windows service? Read PrintNode as a Windows service.
After the installation, PrintNode opens. Log in with the credentials you received by email. Here you'll see your computer's name and which printers are available. These are the printers you'll choose from in Picqer.
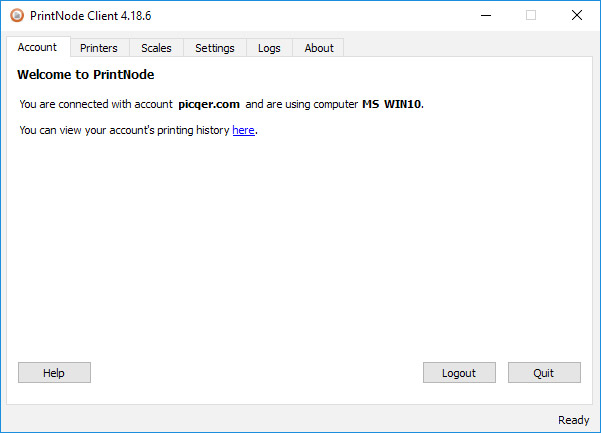
Close the window. PrintNode keeps running in the background. On Windows you'll see its icon in the taskbar, in the bottom right near the clock. On Mac the icon is in the top right.
Printers and packing stations
PrintNode is now ready. To print automatically, the computer and PrintNode both need to stay on. Next, set up your printers and packing stations in Picqer, where you decide which printer prints which documents.