New to our team: Rick and Bram
Meet our new colleagues, Rick and Bram! They’d love to introduce themselves and share a bit about what they do at Picqer.

Rick Gout
Hi! My name is Rick. Together with my colleagues from the Product team, I work on building a solid and scalable technical foundation that allows Picqer to keep evolving. I love that I get to contribute to a tool that helps so many businesses work more efficiently and effectively!
I live in the beautiful city of Zwolle with my wife and our Alaskan Malamute, Apollo. In my free time, I enjoy riding my motorcycle, gaming, playing board games, meeting up with friends, or simply taking a relaxing walk with the dog. I also love to travel—I've just returned from an incredible trip to Japan.
Bram Zegwaart
Hi! I'm Bram. What I enjoy most about my work is making customers genuinely happy. That’s why I collaborate with the Support and Customer Success teams to turn Picqer users into Picqer ambassadors. What really appeals to me about Picqer is that we’re encouraged to take the time to truly listen to customer questions, ask the right follow-ups, and provide answers that aren’t just helpful now but will continue to be valuable in the future.
I live in the historic town of Weesp with my girlfriend Milou and our children, Lou (4) and Daan (2). A lot of my time goes into family life, but outside of that, I'm a huge soccer fan, I play tennis at least twice a week, and I love cooking up delicious meals on the Kamado grill. Right now, we’re actually on a dream trip—a three-month adventure through South Africa—where I’m working remotely.
Changelog
Changelog: New Receipts, Shopify metafields and more
January is already behind us. We hope you’ve recovered from the December rush and that your warehouse is ready for a successful 2025. We’ve got plenty of exciting updates to help you achieve that.
New Receipts
 Last week, we announced a new way to process receipts. The new version is more streamlined and faster to use. Products are added directly to your stock, you can distribute them across containers or locations, and you’ll always have a complete history of who received what and when.
On Monday, February 10, everyone will be switched to the new version. Want to switch earlier? You can enable it now at the top of the Receipts page.
Shopify metafields
You can now import additional product information from Shopify, such as the supplier’s name or the product brand. To do this, link the metafield in Shopify to the corresponding product field in Picqer. See this support page for instructions. The fields ‘country of origin,’ ‘HS code,’ and ‘cost price’ are already linked by default. Note: product fields are only imported for new products.
Other improvements
- New: If a rule cannot be executed correctly, it is now logged in the order log, and administrators will receive a notification. This helps you quickly review any orders or picklists that may need attention.
- New: When creating a picklist via the API, you can now prioritize bulk locations.
- Exporting stock for fulfillment customers is now significantly faster.
Furthermore, we have resolved the following issues:
- Return picklists can now be sent internationally using MyParcel.
- The ‘refunded’ payment status in Shopware 6 no longer reverts a cancellation.
- Order number changes from CCV webshops are now recognized.
- You can now enter dates using the keyboard.
- The app no longer creates multiple batches unintentionally.
- Webhooks for pausing and resuming can be registered again via the API.
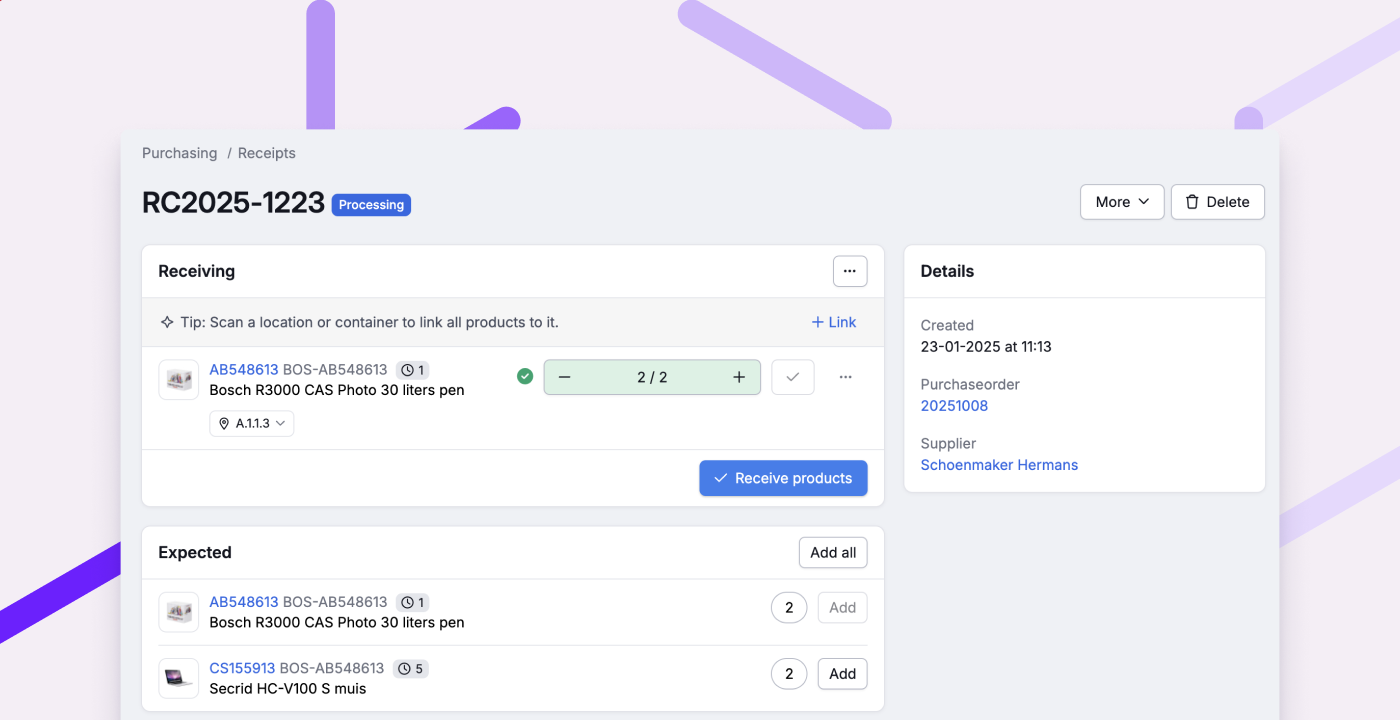
New way of receiving purchase orders
Last year, we introduced a new way to receive purchase orders, where products were added directly to stock, and you could use multiple locations and containers per product. We incorporated many of your requests and enabled new workflows.
However, not all situations improved, and some workflows were difficult to explain. That’s why, at the end of last year, we went back to the drawing board to come up with a better version. And now we have it: a new new way of receiving.
Receiving multiple products at once
With this new method, you can receive multiple products at once. This makes processing small purchase orders faster, helps to detect scanning errors more easily, and improves overall usability.
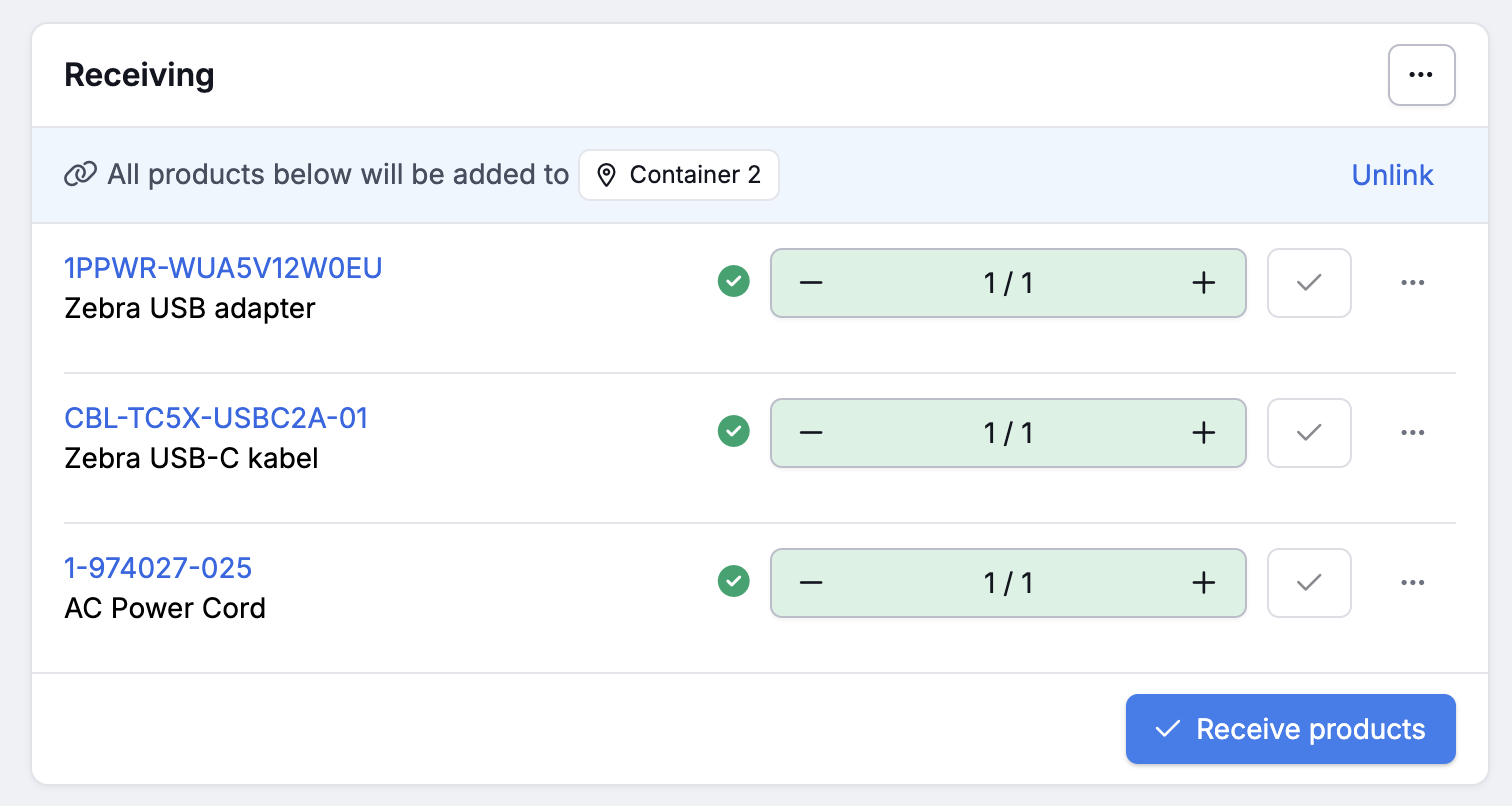
Of course, we retain all the benefits of the version we launched last year: products are added directly to the stock, making them immediately available for use; you can distribute products across containers or multiple locations; and you have a complete history of who received each product.
How it works
Check out a complete tour of the new receiving process:
Launch on February 10
On Monday, February 10, everyone will get access to the new way of receiving purchase orders. Want to switch earlier? You can already switch to the new receiving method on the Receipts page.
Read more about receiving on the receipts help page.
Faster Order Picking and Fewer Mistakes with Barcode Scanners
In e-commerce, everything revolves around speed and accuracy. Orders need to be processed quickly to fulfill promises like “Ordered today, delivered tomorrow.” But how do you ensure a fast order-picking process without making mistakes? Online customers are highly sensitive to even the smallest errors, and mistakes can be incredibly costly in e-commerce.
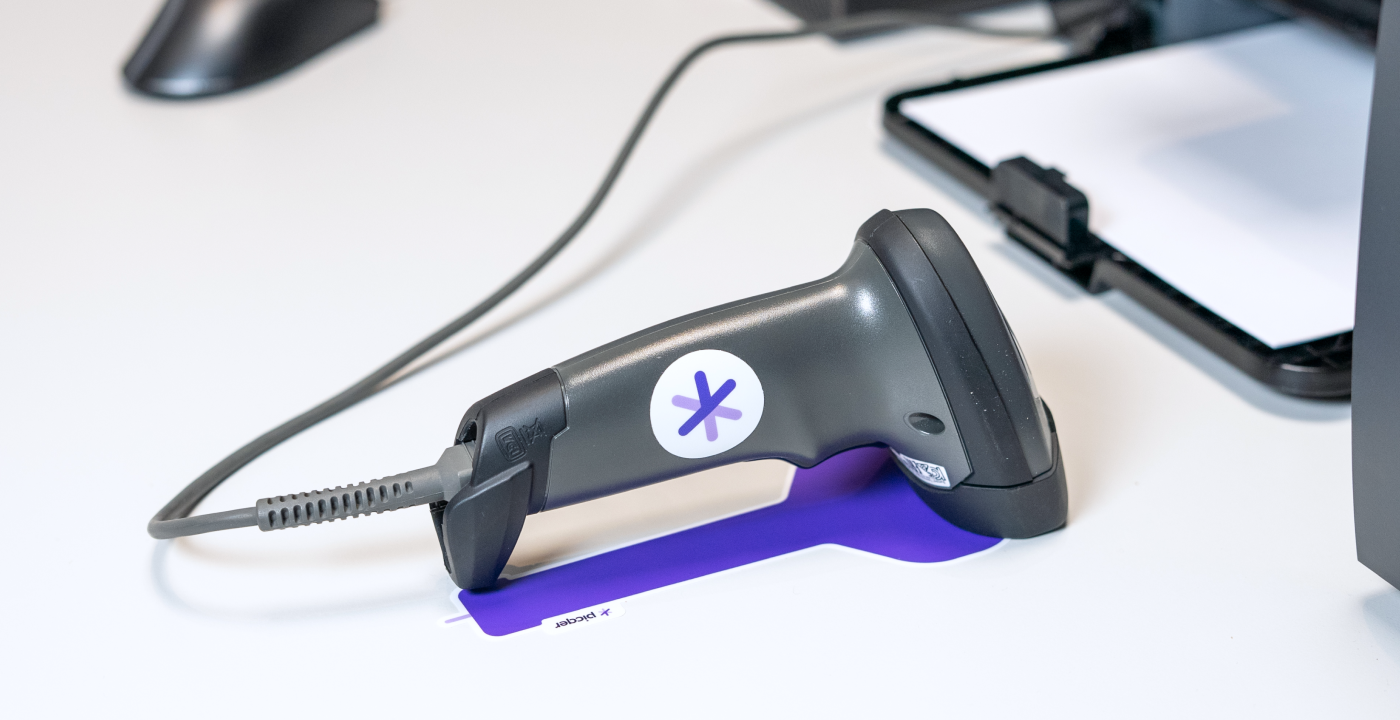
Our advice: use barcode scanners. Here, we’ll explain why barcode scanning not only saves you time but also reduces mistakes.
Faster Order Picking Starts with Preventing Errors
Speed is crucial for any warehouse, but working faster or hiring more staff isn’t always the solution. In fact, rushing increases the chance of mistakes: picking the wrong product from a shelf, packing too much or too little products, or sending packages to the wrong customer.
Fixing these mistakes costs not just time and money but can also lead to dissatisfied customers and negative reviews. Speed is irrelevant if errors are made. Faster order picking, therefore, starts with preventing mistakes.
Changelog
Changelog: Stock counting and other improvements
We hope you’re looking back on a successful 2024, as we certainly do. As January is often a quiet month in e-commerce, and because it feels good to start the year organized, we’ve introduced stock counting. This feature makes it easy to check and correct your stock levels.
Stock counting
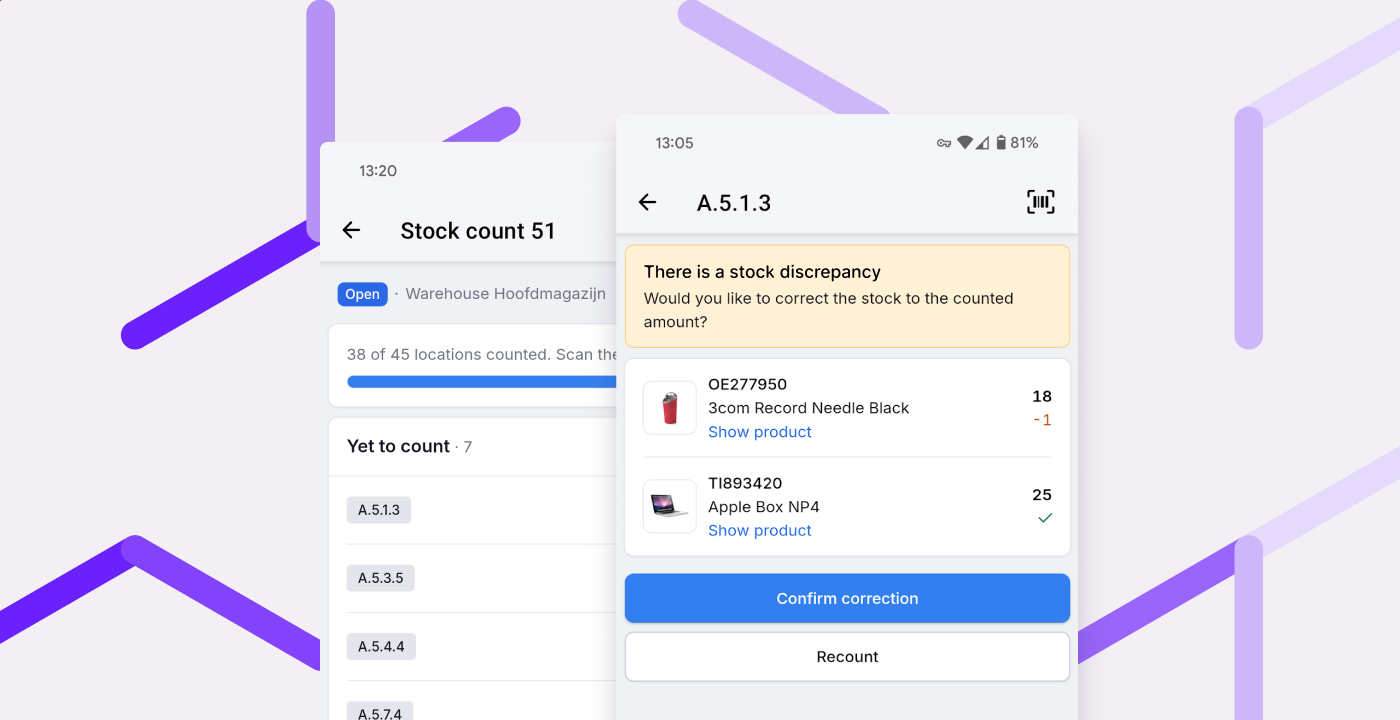
With the app, you can easily start a counting session and scan all products location by location. Picqer tells you whether the stock matches or if discrepancies are found. You can use this feature to check a few locations during an hour of downtime or have all your colleagues help to count the entire warehouse from front to back simultaneously.
And you’ve been using it extensively! Since the introduction three weeks ago, you’ve already counted over 130,000 locations! View the stock counting announcement and video.
Other improvements
- New: You can now bulk edit productcodes yourself. Create an Excel file with your old and new product codes and import that list to apply the changes instantly.
- New: We now import pickup location details from Shopware 6 for QLS.
- The replenish advice is now sorted by bulk location order, making it easier to gather products in sequence. Use containers if you want to organize products in the order of their pick locations.
- In the app, you can also link picking containers to a batch after you staterd picking products.
- Hover over the ‘Snoozed’ label to see until when a picklist is snoozed.
- Loading a large batch in the app is now much faster.
- For Sendcloud, we now support over 100 contracts and sender addresses.
- Movements that have already been processed can no longer be deleted, preserving the history.
- Exporting stock as of a specific date can now handle larger datasets.
- Fixed: A picklist will no longer be printed if a rule specifies that it shouldn’t.
We wish you a wonderful New Year’s celebration and a successful 2025!
Looking for an older article? Browse the full blog archive with all articles.

