External shipping provider integrations in Picqer

To give external parties the same integration options as Picqer itself has, we now have a new service in Picqer. This way, as a shipping provider, you can get your own ‘block’ with logo and explanation on the integrations page of Picqer and customers can easily link the shipping provider to Picqer.

Integration

With this way of integration, after the test period, you can be included as a standard shipping provider without having to depend on our roadmap. The integration will be made and maintained by you, but for users it will feel just as integrated as our first-party integrations. With this way of integration you are responsible for the technical implementation yourself.

Roadmap

The procedure to achieve full integration is as follows:

  • You can get a free developer account for Picqer with which you can test the integration. Contact us for a developer account.
  • Provide us the configuration URL, shipment URL and way of authentication for your test implementation. With this data we will create an integration in test mode which will only be available in your developer account.
  • Now you can start working on the integration.

As soon as the integration is operational:

  • You can give us the URLs for the production environment so we can create a new integration and make it available in your developer account.
  • The integration can now be tested with customers. If the customer asks us about the integration, either directly or through you, we will enable the integration for the customer.
  • At this time we will also work together on the documentation so that it is clear to customers how to set up the integration and so that our Support team can provide good support.

As soon as at least five customers work successfully with the integration:

  • We will go live for all customers. All Picqer users can then use the integration independently and it will be visible on the integrations page in Picqer to everyone.
  • We will now work together with you to publish the integration on our blog, our newsletter and social media. We will also mention the integration on our website.

Integration in Picqer

The general flow with which Picqer users can add a shipping provider in Picqer is as follows. They go to the integrations page and see all integrations there.

Shipping providers in Picqer

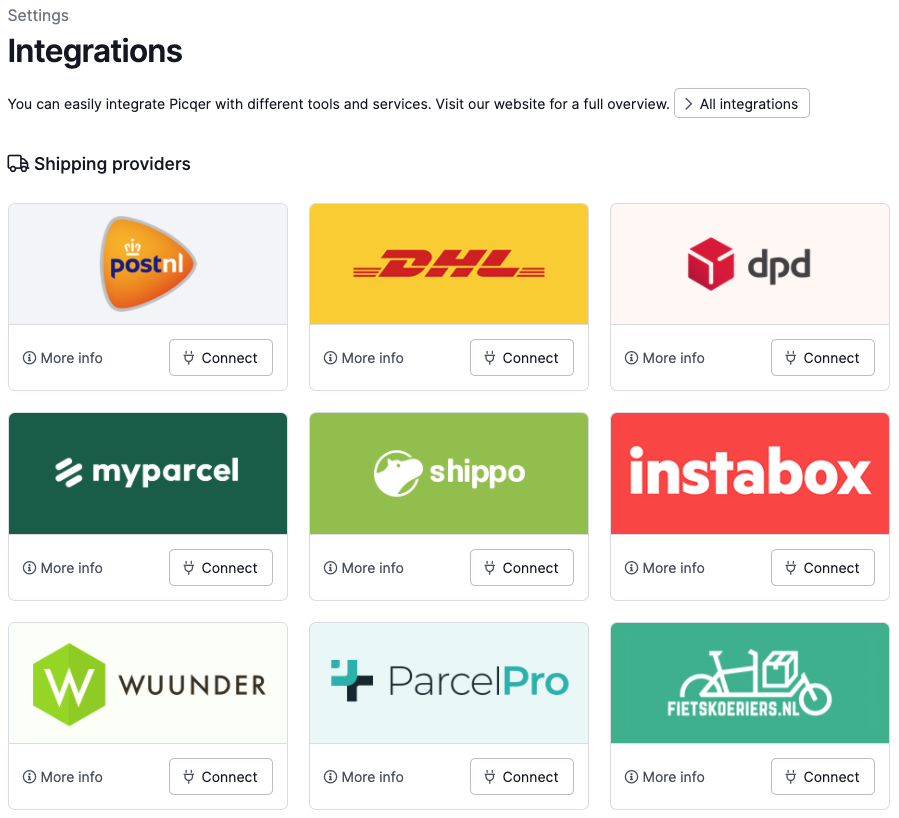
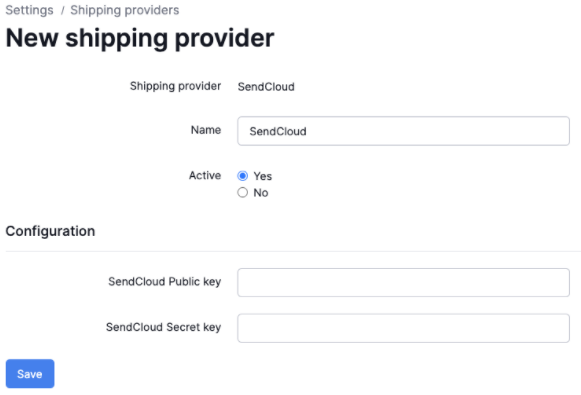
After clicking on ‘Connect’, the general data about the integration, like the credentials, can be filled in:
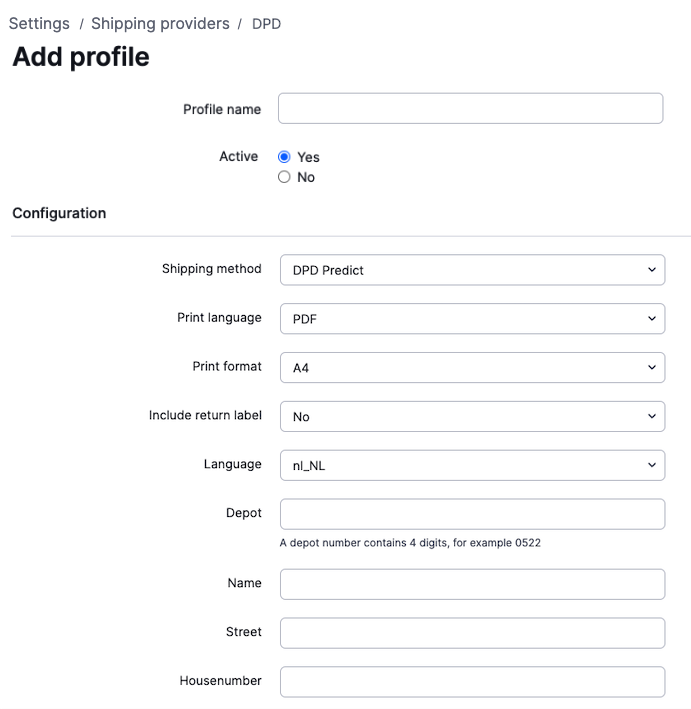
Create a new shipping provider

Profiles

Per shipping provider one or more profiles can be created, in which a user can select a set of options that should be selected for that profile, like sender address, shipping product etcetera.

Add profile for shipping provider

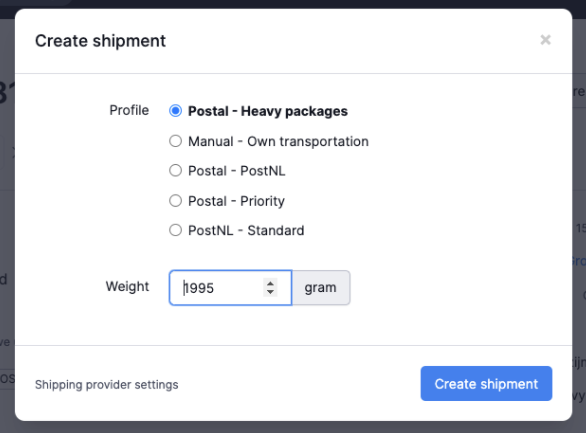
Everytime a customer creates a shipment, the customer chooses which shipping method should be used and Picqer then creates a shipment for the selected shipping provider.

Create shipment

Your integration

From now on it is possible to build an integration which integrates in Picqer the same way. We defined two standard API calls which we can execute on the endpoints you deliver to us. With these API calls we can retrieve the profile options and create a shipment.

Technical documentation

To configure the integration we need the following:

  • Name of the shipping provider
  • URL endpoint for the configuration options
  • URL endpoint to create a label
  • Authentication method via username and password or via API key

We currently only support HTTP Basic Auth for authentication. For the endpoints we currently only support HTTPS connections with TLS 1.1 or later.

An example of a PHP script regarding the two endpoints can be found here.

Configuration options

This is optional. if you're not using any special options, you don't need to give us this URL.

To retrieve the configuration options, we send a GET request with authentication from the user's credentials. We expect to receive all possible configurations for the chosen customer in return.

For each shipment, we will send along which configuration the customer has selected.

GET https://example.com/picqer-integration/config-options
HTTP/1.1 200 OK { "version": "1.0", "data": { "items": [ { "key": "shipping_method", "label": "Shipping method", "description": null, "type": "list", "possible_values": [ { "value": 29, "label": "DHLForYou" }, { "value": 928, "label": "DPD Global" } ], "default_value": 928, "required": true }, { "key": "sender_address", "label": "Sender", "description": "Used as sender address on label", "type": "list", "possible_values": [ { "value": 92828, "label": "Picqer B.V., Meander 601, Arnhem" }, { "value": 273682, "label": "Karwei, Delta 39, Arnhem" } ], "default_value": 92828 }, { "key": "insured", "label": "Insured", "description": null, "type": "list", "possible_values": [ { "value": 0, "label": "No" }, { "value": 1, "label": "Yes" } ], "default_value": 1 }, { "key": "pickup_instructions", "label": "Pickup instructions", "description": null, "type": "text", "default_value": null } ] } }

In this example you see 4 fields which we will show in the configuration of the profile.

  • key: This is the key with which we send back the data to you when creating a shipment.
  • label: This is what we show to the user for this configuration option.
  • description: Optional, gives the user additional explanation about this option.
  • type: "text" for a free text field or "list" for a list of options from which the user can choose.
  • possible_values: If the type is "list", you can provide the options here.
  • default_value: The standard value we will use if no other is chosen.

Creating a shipment

Once the user has created 1 or multiple profiles, they can use these to create a shipment.

When the user creates a shipment, we send a POST request to the URL you have provided. In this request you will receive the chosen options of the profile and details about the shipment. We expect a shipping label in PDF (mandatory) and optionally a ZPL file along with the tracking code and URL in return.

We ensure that the label is automatically printed and that the tracking data is sent to the customer.

POST to for example:

POST https://example.com/picqer-integration/shipments
{ "version": "1.0", "data": { "profile": [ { "key": "shipping_method", "value": 29 }, { "key": "sender_address", "value": 92828 }, { "key": "insured", "value": 0 }, { "key": "pickup_instructions", "value": null } ], "shipment": { "weight": 29388, "total_paid": 291.29, "value_of_goods": 199.99, "recipient": { "name": "Picqer B.V.", "contactname": null, "address": "Meander 251", "address2": null, "zipcode": "6825MC", "city": "Arnhem", "region": "Gelderland", "country": "nl", "emailaddress": "info@picqer.com", "telephone": null }, "references": { "reference": "wintersjaal #8928283", "orderid": "O2018-29230", "returnid": null, "picklistid": "P2018-29382" }, "preferred_delivery_date": "2018-09-09", "pickup_point_data": [], "language": "nl" } } }

First you will receive the chosen configuration options of the profile in "profile".

After that, in the shipment, you will receive the required fields to create a shipment.

Fields that do not speak for themselves are:

  • weight: Weight in grams.
  • total_paid: Price the customer has paid for the products in this shipment.
  • value_of_goods: The purchase value of the products in the shipments, often used for insurance.
  • references: All optional, you can use references.reference to send the reference to the receiver.
  • preferred_delivery_date: Can be used if the customer has submitted a preferred delivery date. Can be 'null' when unused.
  • pickup_point_data: This is an array or object. When there is no pickup_point_data available this will be an empty array (Note: This differs from the "orders" endpoint in the Picqer API). The information in this key depends on the carrier. We strongly encourage you to read the examples page.
  • language: Preferred language of communication with the customer, currently only available in "nl" or "en".
{ "version": "1.0", "data": { "carrier_key": "postnl", "carrier_name": "PostNL", "tracking_code": "xx", "tracking_url": "https://example.com/XX", "label": { "format": "A6", "documents": { "pdf": "--BASE64 ENCODED VERSION OF PDF--", "zpl": "--BASE64 ENCODED VERSION OF ZPL--" } } } }

The processing of the request should take a maximum of 20 seconds, otherwise we will regard this shipment as failed.

  • carrier_key: Not mandatory, but it makes it easier to map the selected shipping provider to the webshops and marketplaces such as Amazon and Bol.com. You can find the available carrier keys at the following page: https://picqer.com/en/api/custom-shippingmethod.
  • carrier_name: The name of the shipping provider as it will be shown to the end customer.
  • tracking_code: (optional, but desired) The tracking code of the shipment.
  • tracking_url: (optional) The URL to the public status page of this shipment.
  • label.format: The physical format of the label, currently we only support 'A6' and ‘A4’ size. Only use ‘A4’ if the label does not fit in ‘A6’ size, like with customs documents.
  • label.documents.pdf: Base64 encoded version of the PDF with the shipping label.
  • label.documents.zpl: (optional) Base64 encoded version of the ZPL of the shipping label.

We always need a PDF version of the label in Picqer. Therefore this is mandatory. Optionally you can also provide the ZPL, which we use when printing on printers that support ZPL.

Errored response

When you send an HTTP Status Code within the 4xx range, we will pick up the error message and show it to the user. You can do this in the format as follows:

{ "version": "1.0", "error_messages": [ "Recipient country not allowed for this product.", "Zip code invalid for country NL" ] }

Responses with a status code in the 5xx range will trigger a generic response in Picqer, this should not be used in regular circumstances.

Customs information

If the country of the recipient is outside the EU customs union, you will receive the field ‘customs_data’ in the shipment in which data about the products of the shipment can be found. You can send us an A4 document with the shipping label/CN23 form, commercial invoice and any other customs documents in return.

Example with customs information:

{ "version": "1.0", "data": { "profile": [ { "key": "shipping_method", "value": 29 }, { "key": "sender_address", "value": 92828 }, { "key": "insured", "value": 0 }, { "key": "pickup_instructions", "value": null } ], "shipment": { "weight": 29388, "total_paid": 291.29, "value_of_goods": 199.99, "recipient": { "name": "Picqer B.V.", "contactname": null, "address": "Meander 251", "address2": null, "zipcode": "6825MC", "city": "Geneva", "region": null, "country": "CH", "emailaddress": "info@picqer.com", "telephone": null }, "references": { "reference": "wintersjaal #8928283", "orderid": "O2018-29230", "returnid": null, "picklistid": "P2018-29382" }, "preferred_delivery_date": "2018-09-09", "pickup_point_data": [], "language": "nl", "customs_data": { "products": [ { "description": "Philips Hue Duo Pack", "amount": 2, "weight": 350, "value": 29.99, "hs_code": "288392", "country_of_origin": "CN" }, { "description": "Philips Hue Remote", "amount": 1, "weight": 150, "value": 49.95, "hs_code": "928382", "country_of_origin": "CN" } ] } } } }

Send all customs documents as A4 label document in return and also mention you use the A4 format. Picqer will then automatically select the correct printer.

Example of your response:

{ "version": "1.0", "data": { "carrier_key": "postnl", "carrier_name": "PostNL", "tracking_code": "xx", "tracking_url": "https://example.com/XX", "label": { "format": "A4", "documents": { "pdf": "--BASE64 ENCODED VERSION OF PDF--" } } } }

You can only send 1 PDF document in return. If multiple documents need to be printed, like with customs information, all documents should be submitted to Picqer in 1 PDF document.

If no customs documents need to be included, you can also respond with an A6 format label.